
Kato, bless their hearts, makes it easy to add lighting to their N scale passenger cars. Let me rephrase that slightly: mostly easy. Their lighting kits aren’t quite the no-brainer drop-ins they’re intended to be, but I’ve installed enough of them now to know their quirks.
In the wake of my big light-kit payoff extravaganza last summer, I naturally included the light kits with my 20th Century Limited order. Lighting really adds a lot to a passenger train. I was fully prepared to cope with the idiosyncrasies.
The best way to install a train’s worth of Kato light kits is to do the prep work beforehand, before opening up any cars. Mainly, it means inserting those tiny orange color filters. It’s by far the most frustrating part of the job, so it’s better to do them all at once. By the third one, I’d found a rhythm, and figured out the easiest way to get the filter sandwiched between the light board and its white plastic bracket without sending it flying. As I discovered with my Broadway Limited, the lighting color is just a little bit off without these things.

Kato light boards, with the orange color filters, awaiting installation in my new 20th Century Limited.
Once all the filters were installed, it was time to open up the cars and install the parts. I found a pleasant surprise inside the first 20th Century Limited car: Kato has added a pair of tall posts to the interior that hold the light board in place. Just by itself, this should solve most of the trouble I’ve encountered with Kato lighting. In handling between shows, light boards tend to wiggle around inside the car just enough for a contact spring to lose contact with the light board’s pickup pin. The car goes dark, or flickers badly, and the only fix is to open it back up and nudge the spring back into place.
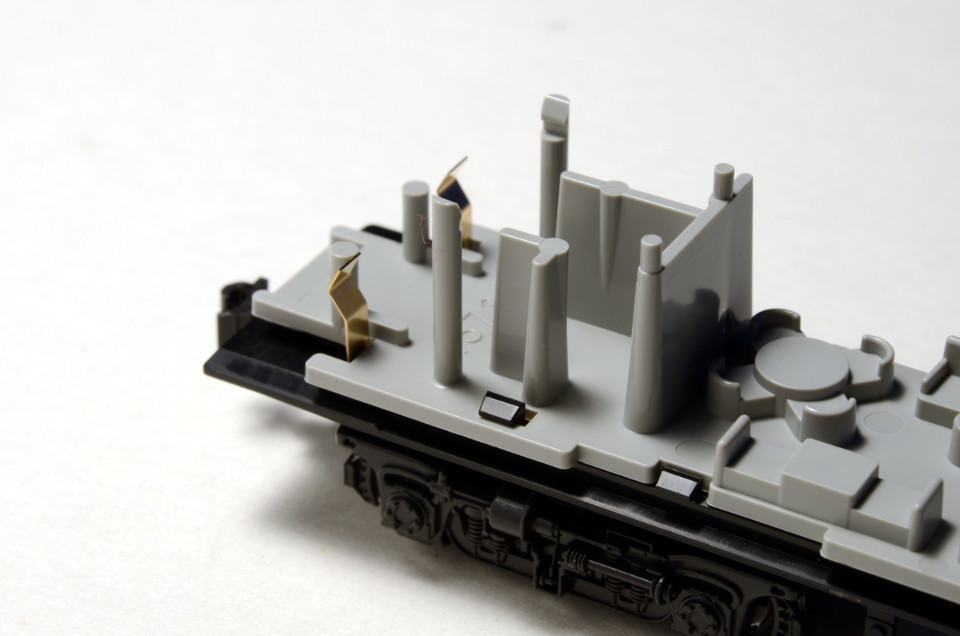
The light board support posts in a Kato 20th Century Limited car.
As always, I gave each contact spring a slight outward bend before sliding it into the chassis. This was where I discovered a brand-new problem. On about half of the Century’s cars, the contact springs would not slide all the way home. I separated the interior from the underframe, and found the problem. Two small plastic ramps molded into the underside of the interior are meant to guide the tip of the spring downward, for contact with the long power strips on the frame. A tiny ridge of plastic on each ramp was snagging the edge of the spring, and preventing it from sliding past. The fix was easy: two light strokes with a sharp X-Acto knife to smooth out the faces of the ramps. I did the same fix on the next several cars, then discovered an even easier one: a very slight downward bend on the very tip of the contact spring. That worked well, too.

Yeah, that’ll be nice.
Before the car goes back together, the diffuser bar needs to be placed in the roof. Here’s another place where I discovered some changes Kato has made from past cars. The diffuser bar no longer needs to snap into the car’s window inserts, a task that I sometimes found tricky. It simply drops into position with the alignment tabs, and additional tall posts on the interior keep it in place after reassembly. Nice touch!
I may try to get the COVID-19 Emergency Railroad set up indoors over Christmas weekend, and watch the Century and the Broadway chase each other in the dark. It’s not normally the kind of thing I’d do, but this hasn’t been a normal year…
