
Once upon a time, Dave built some T-Trak modules. He spread a pair of passing sidings across several of them, and called them “the yard modules.” Those modules proved incredibly useful, and were included in every show layout. When Dave took a break from the hobby, Dana got the yard modules, and they went to so many shows that their foam-over-flakeboard carcases got all beat up. I built new carcases from oak-veneer plywood, and Dana and I installed the old track on them. They continued to go to every show. When Dana stepped back from his train-show activities, I got the yard modules, and here our story begins.
A lot of the guys in the club have T-Trak modules now. Some of them are even basing their home layouts on them. That gives me plenty of options when I’m planning a show layout, but these yard modules are still unique within the group, so they’re always included. Without a passing siding somewhere on the layout, you’re either stuck running the same train all day, or everything gets shut down in front of an audience as one train gets pulled and another put on, one car at a time. Neither option helps retain the audience’s interest.
The original incarnation of the yard modules. Each module was a sandwich of white foam over flakeboard, with Masonite fascias.

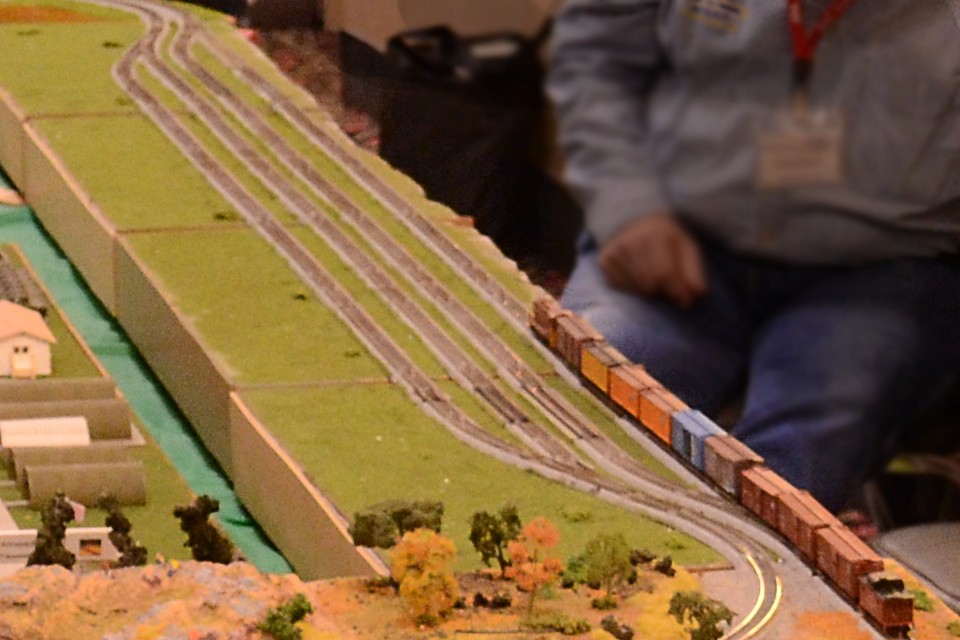
The yard with its original track laid on new plywood bases. The paint was intended as the base for some desert scenery.
There’s a simple reason why yard modules aren’t common: cost. Turnouts are expensive. Kato Unitrack turnouts are particularly expensive. Model railroaders like to sink their limited money into sexier things, like new locomotives, or DCC gear.
What with several years’ worth of heavy usage already, and doubtless more to come, I wanted to make some upgrades to these modules to enhance their usability. First on my list was track. With any sectional track system, it’s sometimes tricky to get everything to join up in a complex plan. Each yard end module branches two tracks into four, and it’s a challenge to make all four tracks line up at the module’s far edge. When Dave originally laid the track, he addressed the issue by using short pieces of flextrack as fillers. While it worked well enough, I found it unsightly. Occasional reliability problems surfaced, usually at awkward times during a show.
It so happens that I have experience with sectional track geometry. After examining the two yard end modules, I determined that it was possible to do an all-Unitrack plan, with just a little bit of surgery along the way. I pulled all the track up, set the flextrack aside, and obtained some additional Unitrack. The modules came with a mix of #4 and #6 turnouts; for consistency I put #6 turnouts on the outer track, and #4s on the inner.
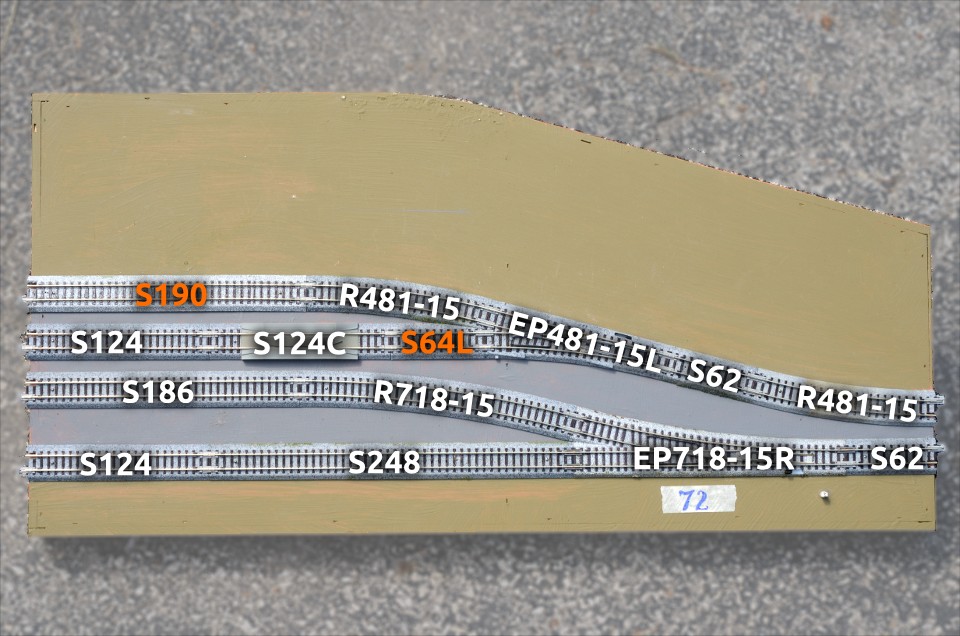 Each end module has two custom-cut pieces of Unitrack. The S64L seen here (and the S64R on the opposite module) are regular S64 straight sections with one corner of the roadbed sliced off for clearance at the turnout end. Kato’s #4 turnouts come with a S60R and a S60L in the package; this is a slightly longer version of that. The S190 has been cut down from a S248. (I could have filled the space with S62 + S64 + S64, if I liked the gratuitous use of rail joiners, which I don’t.) Shortening a piece of Unitrack is not as hard as it looks. Mike Fifer has nicely documented the procedure. I made a Unitrack miter box out of scrap wood, which makes it even easier.
You’ll notice that track spacing is odd. Using Kato #6 turnouts yields a 49mm center-to-center spacing, which is rather wide. The #4 turnout is designed to provide a more realistic 33mm spacing, which the T-Trak standard uses. Since the intermediate yard modules never mate with anything but each other, this is not a problem.
One last touch is a S124C rerailer (Kato markets it as a crossing, with detachable ramps) at the caboose end of either siding. This permits the easy addition of cars to a parked train.
With the track taken care of, a quick repaint was in order. Dana loves western-desert railroading; a redstone-colored base coat of paint was as far as he got with his scenery plan. I went back and gave the decks a hit of my standard eastern-green base color, to match my other modules. Eventually, the yard modules will get my usual ground-cover treatment. The space between tracks got gray, in anticipation of some future ballasting work.
Next, turnout control. Kato’s turnouts are amazing. They can be used manually, and often are, but a switch machine is discreetly built into the base. The mechanism uses a single solenoid working against a pair of small magnets, instead of the more common two-coil design. This permits operation using just two wires, instead of three, but means that control is polarity-dependent. For controlling the turnout with DCC, a regular accessory decoder won’t work. Both Digitrax and NCE make accessory decoders specifically for Unitrack turnouts. The NCE Switch-Kat decoder is more expensive, but it can control Kato’s power-hungry crossovers as well as the single turnouts. (Digitrax specifically warns against using their DS51K1 decoder on the crossovers.) The NCE decoder has another nifty feature: connection points for indicator lights.
Indication? Hell, yeah!
Most hobbyists like to pretend that turnout-position indication is unnecessary. You don’t need no stinkin’ lights! Just look at the turnout points! Um, no. Even if you can see the points clearly from where you are, which you often can’t, you may not have time for more than the briefest of glances while running your train. Inevitably, somebody runs their train into the wrong siding, or hits a turnout set wrong and derails, or shorts out the entire railroad. I’ve done it myself. The real railroads face the same problem; that’s why they equip their switch stands with lamps and/or brightly-painted sheet-metal targets.
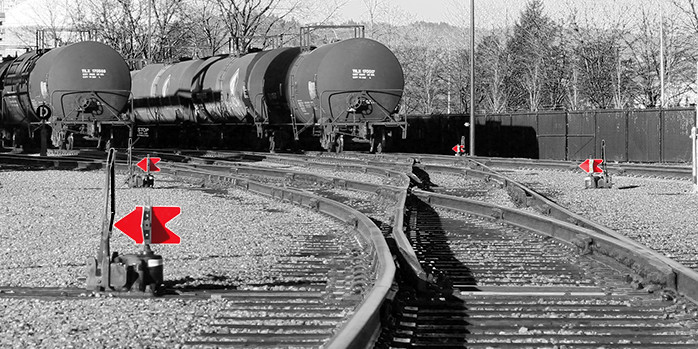
“The visibility of a switch target directly corresponds to faster comprehension and reaction time.” Source: Rail Solutions of Oregon
Switch indicators use various combinations of red, yellow, and green; practices vary among railroads and their suppliers. After a little research, I decided to go with green for the turnout’s normal position, with yellow for diverging. The indicator itself is a pair of bi-color surface-mount LEDs, soldered back-to-back, with fine strands of magnet wire connecting them to the decoder. They’re glued to the top of a short length of 5/32″ styrene tubing. I’ve made little effort for realism here, but once the whole assembly is painted black, you’ll only notice the light anyhow. It’s readily visible from twenty feet away.
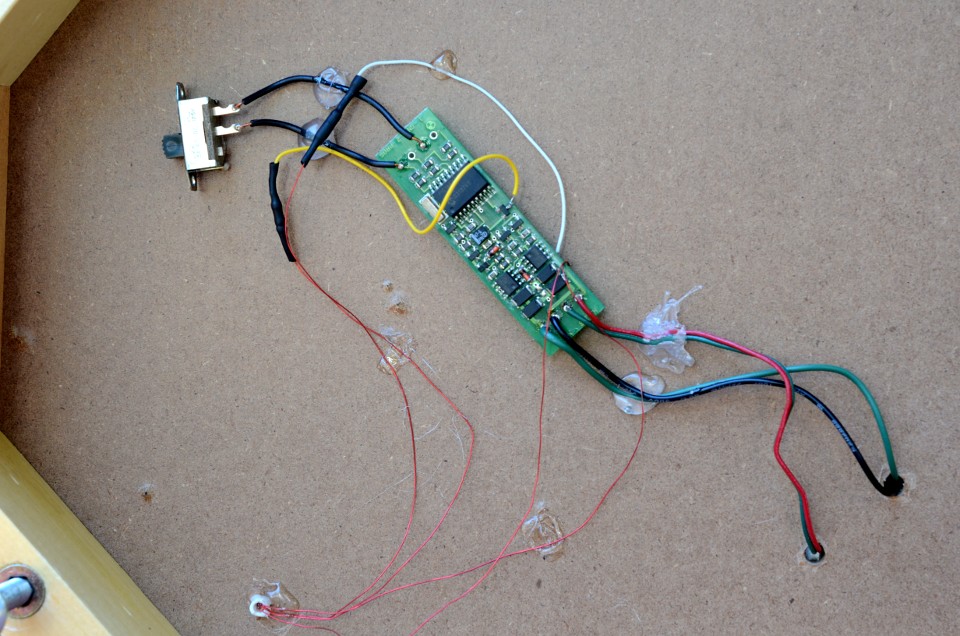
A cut-down secondhand NCE Switch-Kat, with a slide switch for programming, installed under the module. Not pretty, but functional.
 Connecting a Switch-Kat decoder is simple. Two wires come from the track, two wires run to the solenoid. There is a spot on the board to make a temporary connection for address programming. I put a cheap slide switch there to make the job easier, since DCC’s limited accessory address space might necessitate some re-programming if these modules get used in a large show layout. Three solder pads on one side of the board serve as connection points for the indicators. One of my Switch-Kats came to me second-hand; the previous owner cut the board down in an attempt to squeeze it underneath the track. In the process, the indicator pads were chopped right off. I followed the remains of the PCB traces to spots where I could delicately attach the wires.
Controlling a turnout with DCC is quite handy. No more, “hey Bob, can you flip the turnout at your end for me?” It’s the only practical way to control turnouts remotely on a modular railroad. With Switch-Kats now controlling the turnouts on both ends of the outer siding, I’ve done some fiddling with JMRI to see how practical it would be to control an entire railroad with virtual control panels. We still run DC power on the inner tracks at shows, so it might be a while before the inner siding gets decoders, but I’m looking forward to it.
