
Ever since the carpentry work was completed, I’ve been working on George’s layout in borrowed space, and I promised to vacate that space by the end of the month. The whole retaining-wall adventure took way more time than I had anticipated. The entire layout, in fact, has taken way more time. Now I’m on a push to make that time up.
Once the terrain surrounding the masonry gained its final contours, I could go through and paint the remaining landscape with my standard green flat latex. (The road needed some touch-up, too, with my standard earth tone.) Then, time for ground cover.
George and I had already covered about one-third of the layout in ground foam some weeks before, after I’d shown him my process: paint a liberal coat of white glue on the terrain, spread the ground-foam blend on, gently pat it down into the glue, and spritz everything thoroughly with “wet water.” That last item is nothing more than water with a few drops of dish soap added, which breaks the surface tension, and helps the water soak in better. Perhaps George didn’t paint the glue on heavily enough, because after everything was dry, there was a lot of still-loose green stuff floating around. I went back, re-soaked everything, and drizzled diluted glue on top. That’s the great thing about ground cover—you can just keep piling it on until you’re satisfied.
George was adamant about having a farm on the railroad, and thanks to the magic of Ebay, he acquired a barn and farmhouse, already assembled. I believe they’re Model Power products. The farmhouse looked fine to me, but the barn, with its bright, translucent plastic colors, needed some work. The “ground base” got a duller tone of earth (it was molded in a vivid shoe-leather brown) , and my standard green around the edges. For the red sides, I mixed up a darker, brownish red and brushed it on. The roof, likewise, got a darker shade of gray. I did a little touch-up work on the trim and some obvious glue blobs, and called it done. Even without weathering, the barn looks much better.
I have a standard ground-foam blend that goes on my projects: 4 parts Woodland Scenics Coarse Light Green, 4 parts Coarse Medium Green, and 1 part Fine Green Grass. I use the term “standard” very loosely here; I tend to vary the mix for various parts of a layout. An area that will be wooded gets a heavy dose of Fine Earth, and less coarse stuff. Low areas go heavier on the darker greens. Fine Weeds and Burnt Grass are colors that also find their way into the mix at times. The idea here is to get as much variety of color into the landscape as feasible. Nature has a million shades of green, why should you stop at just one?
I do ground cover in small patches, maybe a third of a square foot at a time. I try not to leave a straight border, lest the railroad end up looking like a green quilt. Once a patch is covered, it needs overnight—or longer—to dry. With the surface covered in millions of tiny sponges, it doesn’t set up in one hour like a wood joint!
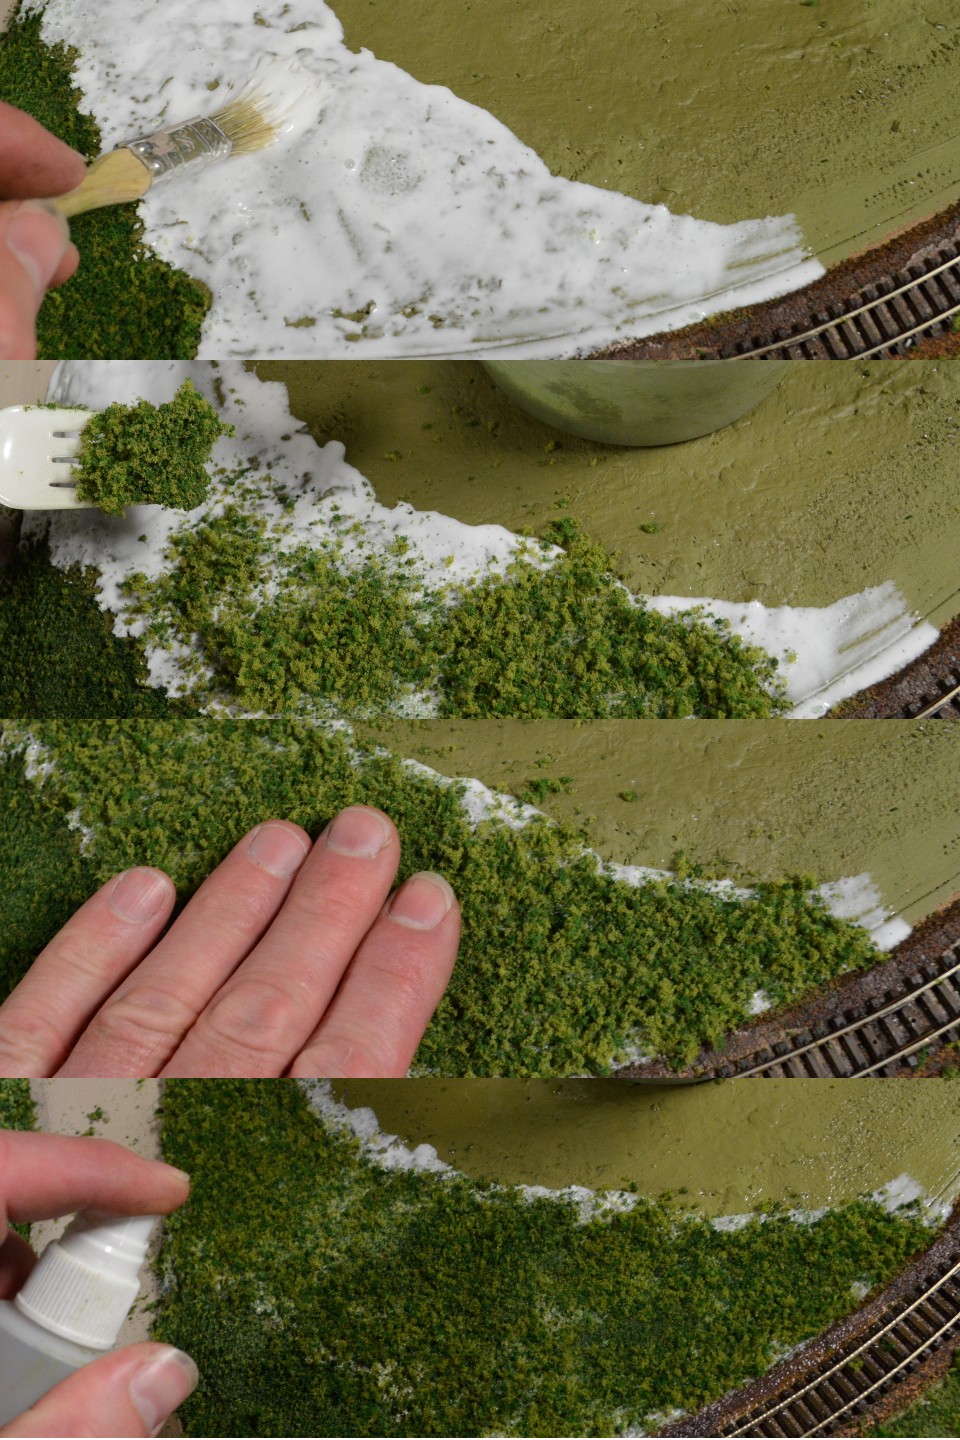
Paint a liberal coat of white glue on the ground. Sprinkle a mixture of foam. Gently pat it into the glue. Spritz everything with water (and pat some more).
Inevitably, the next-day inspection reveals a few bare spots, or places where the foam has not congealed into a solid green coating. A little more glue, more foam, more wet-water fixes that. A micro-vac attachment helps remove stray bits of foam. After that, I’m doing one more round with the airbrush.
