 By late summer, George’s railroad had progressed to the point of needing bridge abutments and retaining walls. Little further work on the scenery would be possible until this masonry work was complete. No problem, I said to myself, I’ve done this before. Piece of cake. So I rooted around for plaster and my favorite tools, and snagged a 1/4″ thick stick of poplar and some scrap pieces of thick MDF from work.
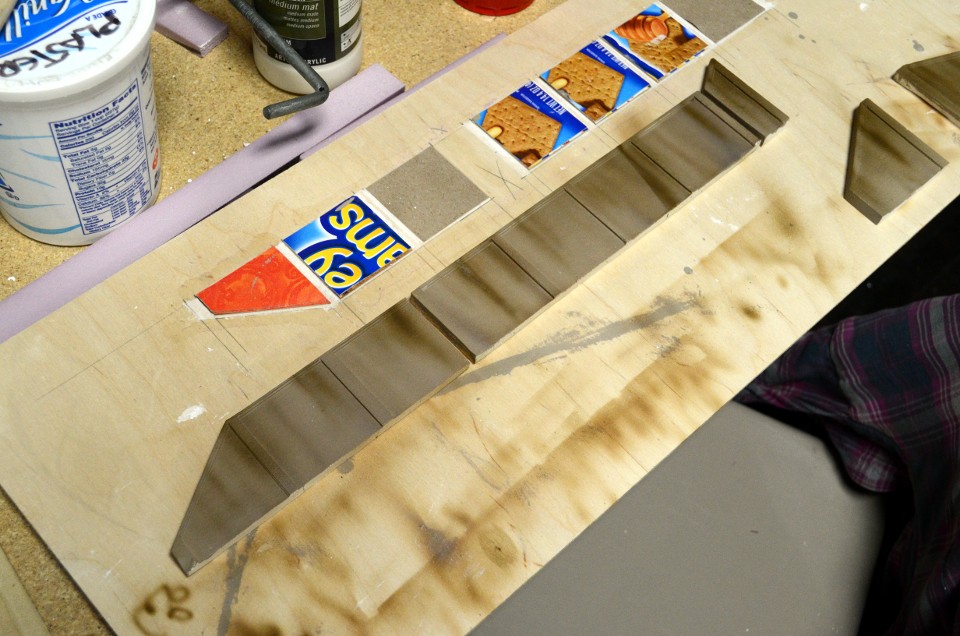
First I made templates of all the necessary pieces from cereal-box cardboard. I then laid out the shapes on MDF. As soon as I set my pencil down, I discovered Problem One: the forms need to be mirror images, because the castings are made face-down. No big deal, right? Grab another chunk of MDF and draw them the other way around. Once that was done, I framed up the drawings with pieces of poplar, and cut more cardboard to fill out the areas between pilasters of the finished castings. The bridge abutments themselves needed to be thicker, so I grabbed some 1/4″ MDF, cut it into sticks, and set them on edge to define the abutments. All the formwork was tacked together with white glue, and everything sprayed afterward with furniture wax.
 I mixed up a little plaster, and did a test pour into the abutment forms. Problem Two: old plaster that has had long-term exposure to moisture doesn’t set. An hour later, the plaster was still pasty. Three days later, it had finally dried into crumbly, useless chunks. I did manage to clean out and salvage the forms. When I had purchased the plaster a few years back, I divided it into three plastic yogurt containers. The first one had been used repeatedly, and had gone bad, but the other two containers remained full and undisturbed. Would they still be good? I mixed a small test batch, and to my relief, the answer was “yes.”
Confidence restored, I mixed up a larger batch and poured. It set up just like it’s supposed to, but then came Problem Three: incorrect form height means incorrect casting thickness. The abutments were far too thick to fit under the bridge properly. The retaining walls, on the other hand, were limited in thickness by the 1/4″ poplar sticks I had used on the forms, and were too thin. Two of them cracked upon unmolding, which also revealed Problem Four: the forms must be flexible enough to easily unmold the castings. Plaster is brittle, duh. You need to peel the forms off the castings. The thick MDF I had used as a base would not flex at all. The poplar sticks around the edges weren’t going without a fight, either. I should have known better. I had used just cardboard and Styrofoam for formwork when I last did plaster casting, and it had worked great.
By now I was running out of time, and George was running low on patience. Time for one more try to make this work the way it’s supposed to. I took a large scrap of 1″ Styrofoam sheet over to the table saw, and sliced off a large number of 3/8″ wide strips. Not only were they a more appropriate thickness for the forms, but they were easily cut with an X-acto knife, which spared me the numerous trips to the bandsaw that the poplar sticks had required. This time, I used a piece of 1/8″ birch plywood, nice and flexible, for the base. The styrofoam, and some cardboard parts, were once again tacked in place with white glue. A fresh hit with the furniture wax, another batch of plaster poured, and…success! As soon as the plaster set up, I flexed the form, eased out the castings, and found them to be good.

On the last portion of the job, the front-facing retaining wall, I once again got careless, and forgot the furniture wax before pouring plaster. Needless to say, extracting the castings got more difficult. I got cracks in three places upon removal, but no matter. They were clean breaks, easily repaired with white glue while the castings were still damp.
With all castings test-fit, trimmed, and patched, I gave them a quick coat of my standard earth-tone flat latex, and got out the airbrush. I added heavy rust streaks to the abutments, underneath the bridge shoes, and lighter streaks elsewhere. (I find this is more easily done before the abutments are installed, as it’s awkward to maneuver an airbrush underneath an N scale bridge.)
Installation was accomplished using PL300 foamboard adhesive, the same stuff I used to install the track. It dries slowly enough that I can shift and shim as needed to make everything line up. I then backfilled with a few careful applications of Sculptamold, and painted with my standard foliage-tone flat latex.
Glad that’s over.
