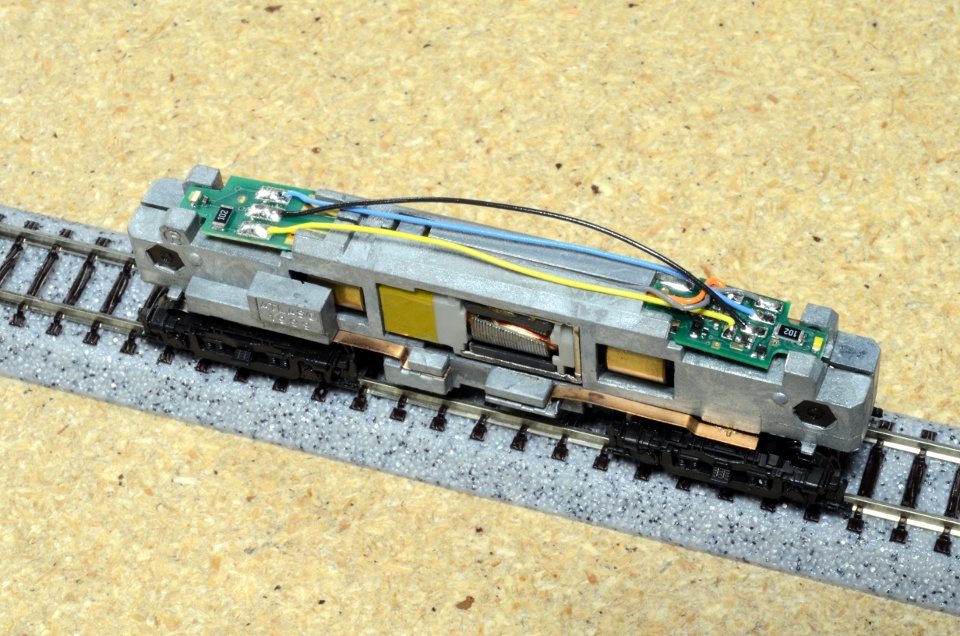
As I mentioned in last week’s post, I just got a decoder into another Atlas RS-3. This is my first decoder installation since I got my new Hakko FX-888D soldering station last winter. After 30 years of working with Radio Shack pencil irons, I found myself doing enough electronics work (mostly, but not entirely, train-related) to justify the upgrade. The Hakko arrived just in time for a project with 115 individual LEDs that needed soldering together. What a difference!
Like I said, cheap pencil irons served me well for decades. For basic soldering tasks like rail joiners, feeders, or the occasional broken wire, they were fine. I snapped the tip off my old one a few years ago, and went back to Radio Shack for another just like it. The sales associate asked if I wanted the extended warranty.
“I got 28 years out of the last one,” I told him, “so, no thanks.”
But times change. Electronics are an ever-growing share of my hobby activities. There’s DCC, of course, but I’m also building throttles for people, assembling a signal system, and installing structure lighting. Components keep getting tinier and more sophisticated. Reluctantly, I admitted that I’d outgrown a tool.
It is possible to enjoy the hobby of model railroading without soldering. If you’re serious about running trains, though, it’s a key skill to have. Loose rail joiners simply cannot be trusted to conduct electricity over time. They loosen, or oxidize, and trains start to stall. What do you do? You solder the rails into the joiners. You solder feeders to more rails. There’s really no substitute.
I started soldering things at around the age of ten or so, using Dad’s big 140-watt Weller soldering gun. My technique was poor, but the stuff I was soldering in those days didn’t require much finesse. Even up until a few years ago, I wasn’t great at it. I did some upgrade work on the GVC’s built-in throttle last year, and was aghast at my poor solder work from just ten years ago. Between decoder installs and Arduino shield assembly, though, I’ve been getting a lot of practice lately, and I’m less embarrassed by the appearance of my circuitry.
Does soldering intimidate you? Let me share some suggestions.
Review this SparkFun soldering tutorial. It’s specifically geared toward people who want to install through-hole components on PC boards, but if you can do that, you’re good for most hobby-related work. When you’re done with the tutorial, take a little time to browse the others that SparkFun has put up on their site. There’s a lot of good stuff there.
Use 0.032″ diameter rosin-core solder. For years, I worked off a spool of 0.062″ diameter solder, and couldn’t understand why I was having so much trouble getting the joints to heat up properly. Then I switched to the same solder (60/40, rosin core) in the smaller diameter, and was amazed as it practically poured itself into joints. To get a proper solder connection, you want to heat the joint up quickly, feed it solder, and get out. The smaller stuff really helps.
Practice. If a joint doesn’t look right, dab a little flux on it, reheat, and try again. Solder is pretty forgiving that way. (Confession: I use a small tin of Oatey paste flux, from the plumbing aisle of the hardware store. A toothpick-sized dab helps the solder flow out if the metal you’re working on has oxidation on it.)
The Hakko, by the way, has proven useful for non-soldering applications, too. Dial the heat setting down to about 300°F, and it’s perfect for heat-sealing Micro-Trains draft-gear boxes.
