Over the winter, I made the leap into laser-cut structure kits. I’ve had The N Scale Architect’s Greendel Tower kit for years, thinking that it would look good on my Susquehannock Industrial Park module, if ever it reached the structure stage. The kit contains parts to build two towers, and the new crossover module I’ve been building needs a tower. It was time to bust into the kit.
I figured this would be the “practice” tower. I’d make my mistakes now, not worry about it too much, and apply the lessons learned to the second tower for Susquehannock.
There’s that phrase again: “not worry too much.” Just who am I kidding, anyway?
First off, the kit had no floors. I spent a few minutes at the end of the workday cutting a scrap of 3-mil MDF into very precisely-sized floors. The idea is not just to block the sunlight into the lower floor of the tower, but to also add some much-needed rigidity. This building is going on a module, and it will be traveling a lot.
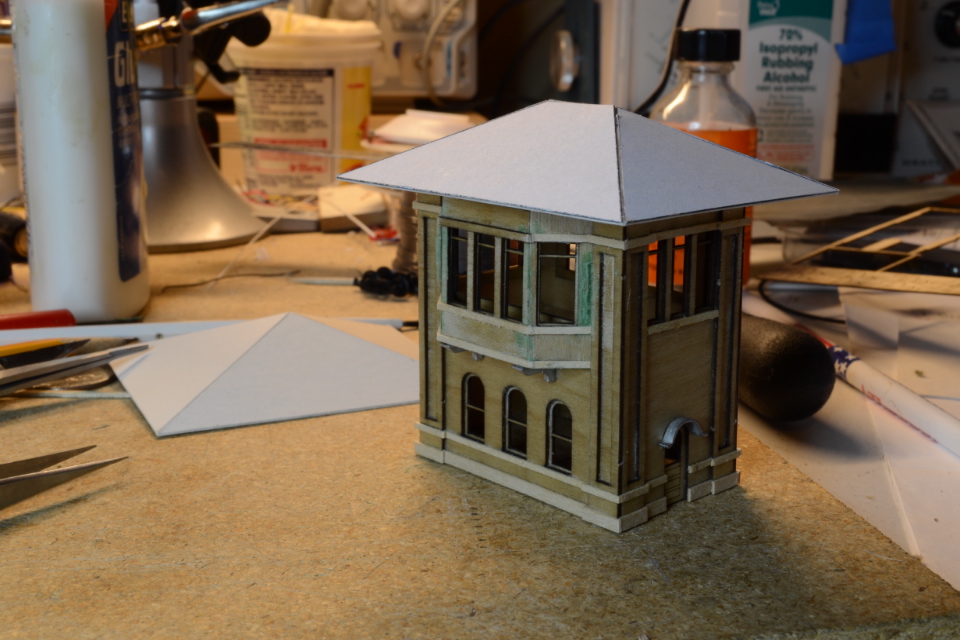
I got the window frames attached to the walls without too much grief, assembled the walls around my custom-fabricated floors, and turned my attention to the roof, which is not laser cut. What you get is a template, a chunk of cardboard, and a printed paper overlay. If you follow the directions precisely, and do a careful job, you end up with a roof that is incorrectly shaped for this tower. It tapers to a point, like a pyramid. It’s supposed to have a short ridgeline. (How do I know this? I have inside information from the federal government!) A little geometry to plot out the pieces properly, some cutting, and pasting…and I have a proper roof.
Before the roof went on, though, I figured some interior detail would be wise, considering all those windows. Lackawanna concrete towers had a built-in desk that filled the bay window, so I cut a trapezoid-shaped desktop from cardboard. The interlocking machines were either mechanical or electro-pneumatic. I elected to go with a mechanical one, and made a crude set of Armstrong levers from square styrene rod. I could’ve added a lot more details, too, but I stopped there, and attached the roof.
The trim was another ordeal. Much of it comes in the form of fine wood strip, which needs to be cut to fit and glued into place, piece by piece. The corbels under the roof were laser-cut, thankfully, but still needed to be separated from the sheet, and carefully glued into position.
Once assembly was complete, I dug out the airbrush, mixed up some paint, and gave it a solid coat of concrete color. Out in the real world, concrete structures are never a single shade of gray. There’s always streaking, bleeding, and various other forms of interesting discoloration. I didn’t go nuts on that, but I did do some dark streaks under the windows, following some photo references I found. The green window trim went on with a 000 brush.
So, in walking the line between just slapping the thing together, and pushing my patience past the limit, how did I do?

Honesty compels me to admit that there were only two entries in the contest. The other one was a covered bridge in HO, which was nicely done. It seemed only fair to give that one my vote.
